Category Archives: gdal/ogr

Creating sample points (Pt. 3): Uniform random sampling – Triangulation

The third edition of this series will introduce a more complex sampling method to create points that are spread both randomly and uniformly over the area of a given source polygon.

Previously published parts of this series include:

Uniform random sampling

To distribute points in a polygon in a uniform and random manner we are going to follow an approach laid out within the scope of a discussion amongst MATLAB users. In case the internet will forget this minor thread someday, here’s the reduction of the problem as laid out by merited forum contributor John D’Errico:

“[…] the general approach […] that generates uniform random points inside a general object in n-dimensions.

“Compute the area/volume of each simplex, then assign points to them randomly with probability defined by their area relative to the total area. Within each simplex, […] use a […] method of generating random points […].

“Of course, you need a triangulation of the polygon, but as long as the polygon is a convex one, this is trivial with [D]elaunay.”

To summarize these are steps necessary to create uniform random points in a polygon:

  1. Use the polygon’s vertices to create a Delaunay triangulation. As we can’t guarantee that real-world data will only contain convex geometries, this needs to be generalized form of it, a constrained Delaunay triangulation.
  2. Use the area of each created triangle to create a weighted random selection, i.e. to assure that larger triangles a picked more likely than smaller ones.
  3. Randomly create a point inside the selected triangle.

Now these procedure shall be repeated until a certain stop criterion is fulfilled, something that we will discuss later on. Let’s start with triangualation first.

Delaunay triangulation and constrained Delaunay triangulation

Whilst the original (C++) OGR library contains a method DelaunayTriangulation to retrieve just that for an input geometry, this function is not part of the OGR Python bindings. However, as with most tasks there is already another library that can do what we want. In this case we refer to poly2tri. Originally provided in Java and C++, there also exists a Python version of it. (There are some peculiar patches necessary to get poly2tri to work under Python that I will devote another blog entry for.)

Using Shapely and poly2tri it is now possible to initiate a constrained Delaunay triangulation (CDT):

>>> # creating a source polygon first
>>> from shapely.geometry import Polygon
>>> from shapely.wkt import loads
>>> polygon = loads(open(r"real_world_data.wkt").read())
>>> # preparing list of vertices and adding those of current polygon to it
>>> vertices = list()
>>> for coord_pair in polygon.exterior.coords:
...     vertices.append(coord_pair)
>>> # p2t is the Python module name for poly2tri
>>> import p2t

Now two things have to be considered. First, poly2tri brings its very own Point definition that needs to be distinguished from the one Shapely provides by explicitly using the prefix p2t. Adding to that it must be avoided that the CDT is fed with duplicate points – i.e. as first and last vertex are usually specified in polygon definition. We can deal with this constraint by omitting the first vertex:

>>> # making sure that only one of first or last vertex
>>> # is used to create list of input points for triangulation
>>> border = [p2t.Point(x, y) for x, y in vertices[1:]]
>>> # setting up constrained Delaunay triangulation
>>> cdt = p2t.CDT(border)

Now real-world data kicks in back again as it may contain holes, or interior rings as they are called correctly. These need to be specified separately as input for the CDT:

>>> for interior_ring in polygon.interiors:
...     hole = list()
...     for coord_pair in interior_ring.coords:
...             hole.append(coord_pair)
...     else:
...             cdt.add_hole([p2t.Point(x, y) for x, y in hole[1:]])

Finally, the triangulation can be performed:

>>> triangulation = cdt.triangulate()
>>> print len(triangulation)
1964
>>> for t in triangulation:
...     triangle = Polygon([(t.a.x, t.a.y), (t.b.x, t.b.y), (t.c.x, t.c.y)])
...     print triangle
...
POLYGON ((366392.3774440361 5640960.820684713, 367546.1057238859 5641233.076879927, 366393.6058517902 5641064.830985503, 366392.3774440361 5640960.820684713))
POLYGON ((366393.6058517902 5641064.830985503, 367546.1057238859 5641233.076879927, 367452.1526190441 5641333.95416048, 366393.6058517902 5641064.830985503))
...
...

Following is the visual result of the triangulation.

A constrained Delaunay triangulation was applied to this real-world polygon.

Next up in line to create uniformly random sample points are weighted random selection of triangles and random generation of points inside such a given triangle.

Creating sample points (Pt. 2): Regular grid sampling

In this edition of our series dedicated to polygon sampling techniques we will look into the process of creating regularly gridded sample points with non-uniform intervals.

Previously published parts of this series include:

Regular grid sampling

Using a single point to represent a whole polygon geometry may satisfy only the most basic sampling demands. Another – and certainly more applicable – way to arrange sample points is to create virtual grids of such points that stretch out over the whole area of the polygon to be processed. To do so we need a regular interval between sample points that may be defined identical (i.e. uniform) in both x- and y-direction. Here we will go the more generic route and implement separately adjustable (i.e. non-uniform) intervals for x and y.

The value range of sample coordinates is of course laid out by the extent of the source polygon. Using Shapely the extent of a polygon is called forth by the property bounds:

>>> from shapely.geometry import Polygon
>>> polygon = Polygon([(0,0), (6,0), (0,6)])
>>> print polygon.bounds
(0.0, 0.0, 6.0, 6.0)

Given two intervals in x and y it is now easy to create points at regular gridded positions laid out over the extent of the source polygon. Additionally it should be assured that created points are actually within the polygon to be sampled.

>>> from shapely.geometry import Point
>>> bounds = polygon.bounds
>>> ll = bounds[:2] # lower left coordinate pair of polygon's extent
>>> ur = bounds[2:] # upper right                  ~
>>> x_interval = 1.5
>>> y_interval = 2.0
>>> for x in floatrange(ll[0], ur[0], x_interval):
...     for y in floatrange(ll[1], ur[1], y_interval):
...             point = Point(x, y)
...             if point.within(polygon):
...                     print point
...
POINT (1.5 2)
POINT (1.5 4)
POINT (3 2)

Now real-world spatial data is different yet again as it rarely comes with extents fitting to full meters. It is still possible to have regularly gridded sample points that have *nicely* looking coordinates by creating extent ceilings and floors used as base for the sampling process. We can actually use our defined intervals to create these values:

>>> from shapely.wkt import loads
>>> polygon = loads(open(r"real_world_data.wkt").read())
>>> polygon.bounds
(366392.3774440361, 5630693.4900143575, 373404.5164361303, 5641855.842006282)
>>> ll = polygon.bounds[:2]
>>> ur = polygon.bounds[2:]
>>> x_interval = 100
>>> y_interval = 200
>>> low_x = int(ll[0]) / x_interval * x_interval
>>> upp_x = int(ur[0]) / x_interval * x_interval + x_interval
>>> low_y = int(ll[1]) / y_interval * y_interval
>>> upp_y = int(ur[1]) / y_interval * y_interval + y_interval
>>> print low_x, upp_x, low_y, upp_y
366300 373500 5630600 5642000

Putting it all together

To extend our previously introduced PolygonPointSampler, we can combine all our findings in a new sub class RegularGridSampler. This one will also make use of the possibility of creating a separate constructor as there is the need to define the sampling intervals.

class RegularGridSampler(PolygonPointSampler):
    def __init__(self, polygon = '', x_interval = 100, y_interval = 100):
        super(self.__class__, self).__init__(polygon)
        self.x_interval = x_interval
        self.y_interval = y_interval
    
    def perform_sampling(self):
        u"""
        Perform sampling by substituting the polygon with a regular grid of
        sample points within it. The distance between the sample points is
        given by x_interval and y_interval.
        """
        if not self.prepared:
            self.prepare_sampling()
        ll = self.polygon.bounds[:2]
        ur = self.polygon.bounds[2:]
        low_x = int(ll[0]) / self.x_interval * self.x_interval
        upp_x = int(ur[0]) / self.x_interval * self.x_interval + self.x_interval
        low_y = int(ll[1]) / self.y_interval * self.y_interval
        upp_y = int(ur[1]) / self.y_interval * self.y_interval + self.y_interval
        
        for x in floatrange(low_x, upp_x, self.x_interval):
            for y in floatrange(low_y, upp_y, self.y_interval):
                p = Point(x, y)
                if p.within(self.polygon):
                    self.samples.append(p)

Using our real-world example and a (uniform) sampling interval of 1,000 meters we arrive at the following result:

A real-world polygon with a regular grid of sampling points.

We may also use non-uniform sampling intervals of 1,000 meters in x- and 500 meters in y-direction:

A real-world polygon with a regular grid of sampling points using non-uniform sampling intervals.

A multi-part polygon may also be used to apply the sampler, for example with a uniform sampling interval of 250 m:

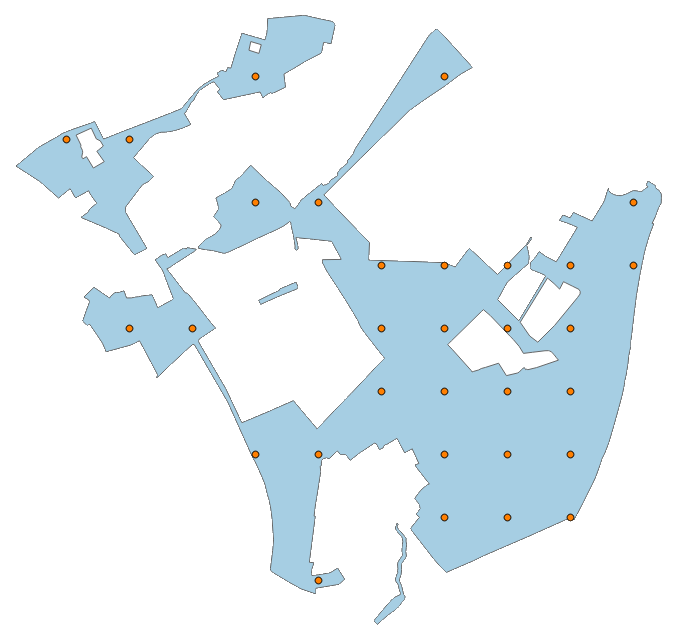
A multi-part polygon consisting of four parts sampled by a regular grid with a uniform sampling interval of 250 m.

WTH is a floatrange?

In the meantime you most likely have already realized that we’re using a non-standard range function to iterate over a range of float values. Based on a StackExchange suggestion I have defined an according routine in a utility function:

def floatrange(start, stop, step):
    while start < stop:
        yield start
        start += step

Creating sample points (Pt. 1): Centroids and representative points

Following the declaration of my PolygonPointSampler’s base class in the previous post, I will now start to implement multiple classes each representing a different method to derive sample points for a given polygon.

Centroid sampling

Let’s start with the simplest polygon-to-point sampling method available: the creation of a centroid point. The centroid represents the geometric center of a polygon. If we’re looking at a triangle it emerges as the intersection of the triangle’s median lines, hence it is sometimes also called the median point. Shapely allows to derive a polygon’s centroid by querying the corresponding attribute:

>>> from shapely.geometry import Polygon
>>> polygon = Polygon([(0,0), (6,0), (0,6)])
>>> centroid = polygon.centroid
>>> print centroid
POINT (2 2)

Applying this method to some real-word data will often lead to the phenomenon visible below: The centroid comes to lie outside of the original polygon’s interior.

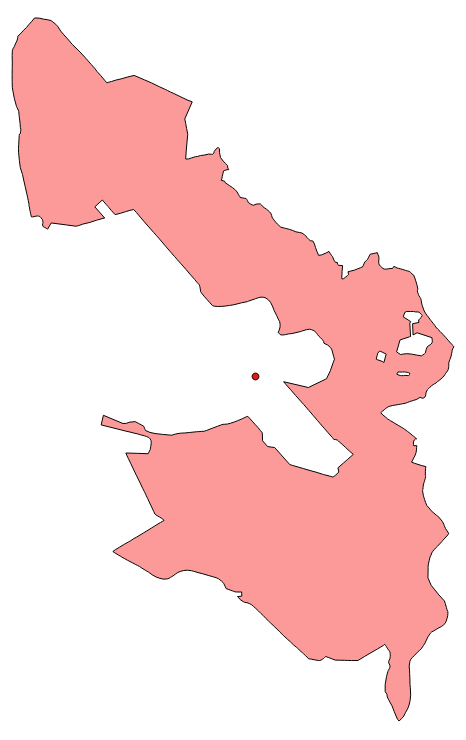
A real-world polygon with a sampling centroid.

Representative point sampling

To deal with this problem, Shapely equips geometry objects with a method called representative_point() that – as the documentation reads – “returns a cheaply computed point that is guaranteed to be within the geometric object”. Judging from the Shapely source code this method goes back to the PointOnSurface function provided by GEOS. I haven’t been able to find out how exactly it is guaranteed that the sample point is an interior point, but from the looks of it, it is most likely that the algorithm described in a fitting thread at gis.stackexchange.com has been applied to it. In any way for our Python example the code would look like the following:

>>> representative_point = polygon.representative_point()
>>> print representative_point
POINT (1.5 3)

Please note that querying for the representative point of a polygon actually calls a Python function – as indicated by the brackets following the according declaration – while the centroid is a property of the Shapely polygon object. Using real-world data we arrive at the situation displayed below:

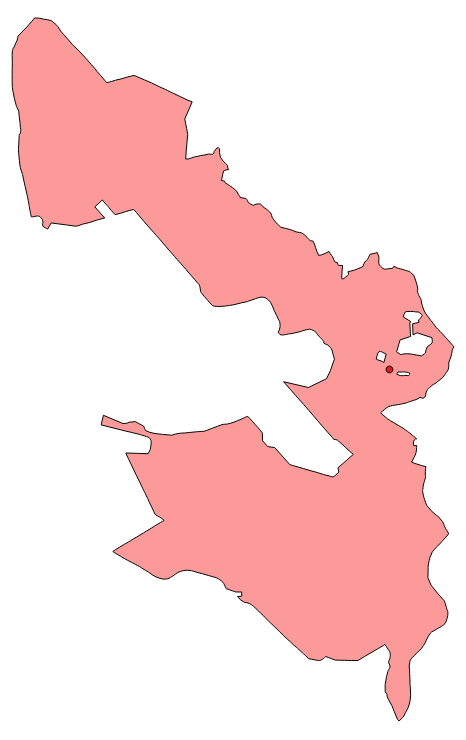
A real-world polygon with a sampling representative point.

It is also possible to apply the sampler on multi-part polygons:

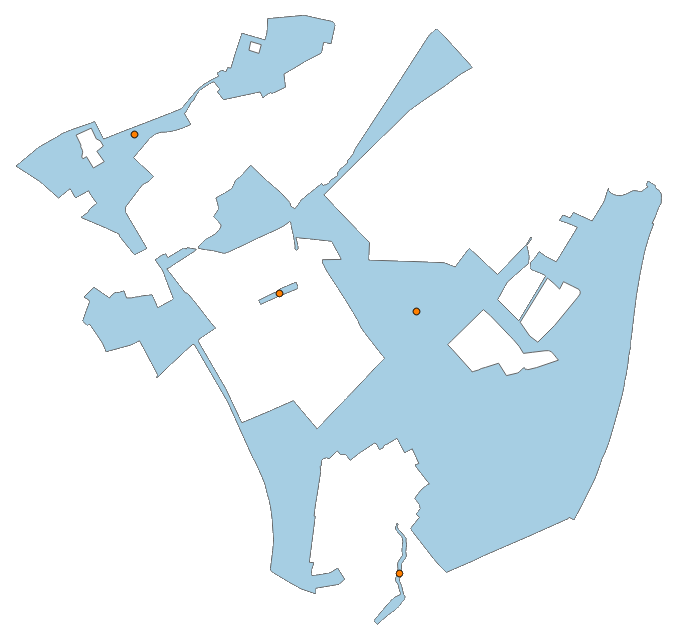
A multi-part polygon consisting of four parts each sampled by a representative point.

Putting it all together

Based on the knowledge laid out above, it is now possible to furnish the previously created PolygonPointSampler base object with extensions that create sample points by either using the centroid or representative point method. I have called them CentroidSampler and RepresentativePointSampler, respectively:

class CentroidSampler(PolygonPointSampler):
    def perform_sampling(self):
        u"""
        Perform sampling by reprensenting each source polygon with its centroid.
        """
        if not self.prepared:
            self.prepare_sampling()
        for src in self.src:
            self.samples.append(src.centroid)
class RepresentativePointSampler(PolygonPointSampler):
    def perform_sampling(self):
        u"""
        Perform sampling by representing each source polygon with a
        representative point whose coordinates are guaranteed to be within
        the polygon's geometry.
        """
        if not self.prepared:
            self.prepare_sampling()
        for src in self.src:
            self.samples.append(src.representative_point())


Creating sample points in a polygon with OGR and Shapely (Introduction)

Creating sample points for a given region of interest is a common task in geospatial analysis. It is therefore logically consistent that there is already a number of ways available to create some including the Create Random Points tool of the ArcToolbox in ArcGIS or the corresponding components of the fTools plugin for QGIS. As I’m trying to follow an explicit under-the-hood-philosophy, I will – starting with this very first “real” entry at Portolan – implement my very own sampling methodology for anyone willing to follow.

As it is my (current) programming language of choice I will use Python to accomplish my task. Adding to the fact that I have plenty of working experience with it, Python has the advantage of being very well positioned in the realm of geospatial processing. This is courtesy of a wide range of libraries dealing with corresponding tasks including two that I will use extensively, namely OGR (as part of GDAL) and Shapely. While OGR serves as a well suited toolbox for all things vector – including export and import to external file and/or database formats, basic dataset creation and editing as well as more sophisticated procedures such as generalization – I have found Shapely (basically representing a Pythonic interface to libgeos that is also used by OGR itself) to be a more direct link to the topological operations that are bread and butter for any kind of geographical information system.

As Python explicitly encourages the object-oriented programming paradigm, I will follow that and implement my very own PolygonPointSampler in compliance to that paradigm. Mind you, I’m not an explicitly stated computer scientist, but a cartographer by trait that somehow turned into a mostly self-taught specialist for geoinformatics. My theoretical ramblings with regard to programming may be a little off from time to time, however all of the things presented here do actually work in practice – which is most important for me. And maybe for the reader as well.

Corresponding to these prerequisites a base class for a PolygonPointSampler could be implemented as set out in the following listing:

u"""
A base class for creating sample points located in a given region of interest,
i.e. polygon.
"""

from shapely.geometry import Polygon

class PolygonPointSampler(object):

    def __init__(self, polygon = ''):
        u"""
        Initialize a new PolygonPointSampler object using the specified polygon
        object (as allocated by Shapely). If no polygon is given a new empty
        one is created and set as the base polygon.
        """
        if polygon:
            self.polygon = polygon
        else:
            self.polygon = Polygon()
        self.samples = list()
        self.sample_count = 0
        self.prepared = False

    def add_polygon(self, polygon):
        u"""
        Add another polygon entity to the base polygon by geometrically unifying
        it with the current one.
        """
        self.polygon = self.polygon.union(polygon)
        self.prepared = False

    def print_samples(self):
        u"""
        Print all sample points using their WKT representation.
        """
        for sample_pt in self.samples:
            print sample_pt

    def prepare_sampling(self):
        u"""
        Prepare the actual sampling procedure by splitting up the specified base
        polygon (that may consist of multiple simple polygons) and appending its
        compartments to a dedicated list.
        """
        self.src = list()
        if hasattr(self.polygon, 'geoms'):
            for py in self.polygon:
                self.src.append(py)
        else:
            self.src.append(self.polygon)
        self.prepared = True

    def perform_sampling(self):
        u"""
        Create a stub for the actual sampling procedure.
        """
        raise NotImplementedError